If your child's handwriting looks like a toddler with a crayon had a fight with a page, I get it. Honestly, I've seen that mess more times than I can count. But here's the thing — it doesn't have to stay that way. The right printable worksheets letter tracing can turn those shaky scribbles into confident, legible letters faster than you'd expect.
Look, we both know the internet is drowning in free worksheets. Most of them? Garbage. Too busy, too boring, or just plain confusing for little hands. Your kid doesn't need more screen time or another app that does the work for them. They need something tactile, something they can actually feel under their fingers. That's where a good old-fashioned printed page wins every single time. And right now — maybe before kindergarten starts, or before that next parent-teacher conference — is the perfect moment to make this change stick.
I'm going to show you exactly what separates a worksheet that works from one that collects dust. No fluff, no ten-step systems. Just the patterns that actually build muscle memory and confidence. Real talk: you'll probably want to print a few pages before you finish reading this. That's fine. Go ahead.
Let's be honest about handwriting practice: most of the materials you find online are either too babyish for a child who needs real work or they skip straight to sentences before a kid has the muscle memory for a lowercase 'b'. I've spent years watching parents and teachers burn through stacks of generic worksheets, wondering why their kids still reverse letters or grip the pencil like a caveman. The problem isn't the child's ability. The problem is that the tracing activities lack deliberate, sequenced repetition. The real skill is not just tracing a line; it's training the hand to anticipate the shape before the pencil touches the paper. That's where a well-designed set of printable worksheets letter tracing can genuinely change the game — but only if you use them the right way.
Why Most Tracing Worksheets Fail Before You Even Print Them
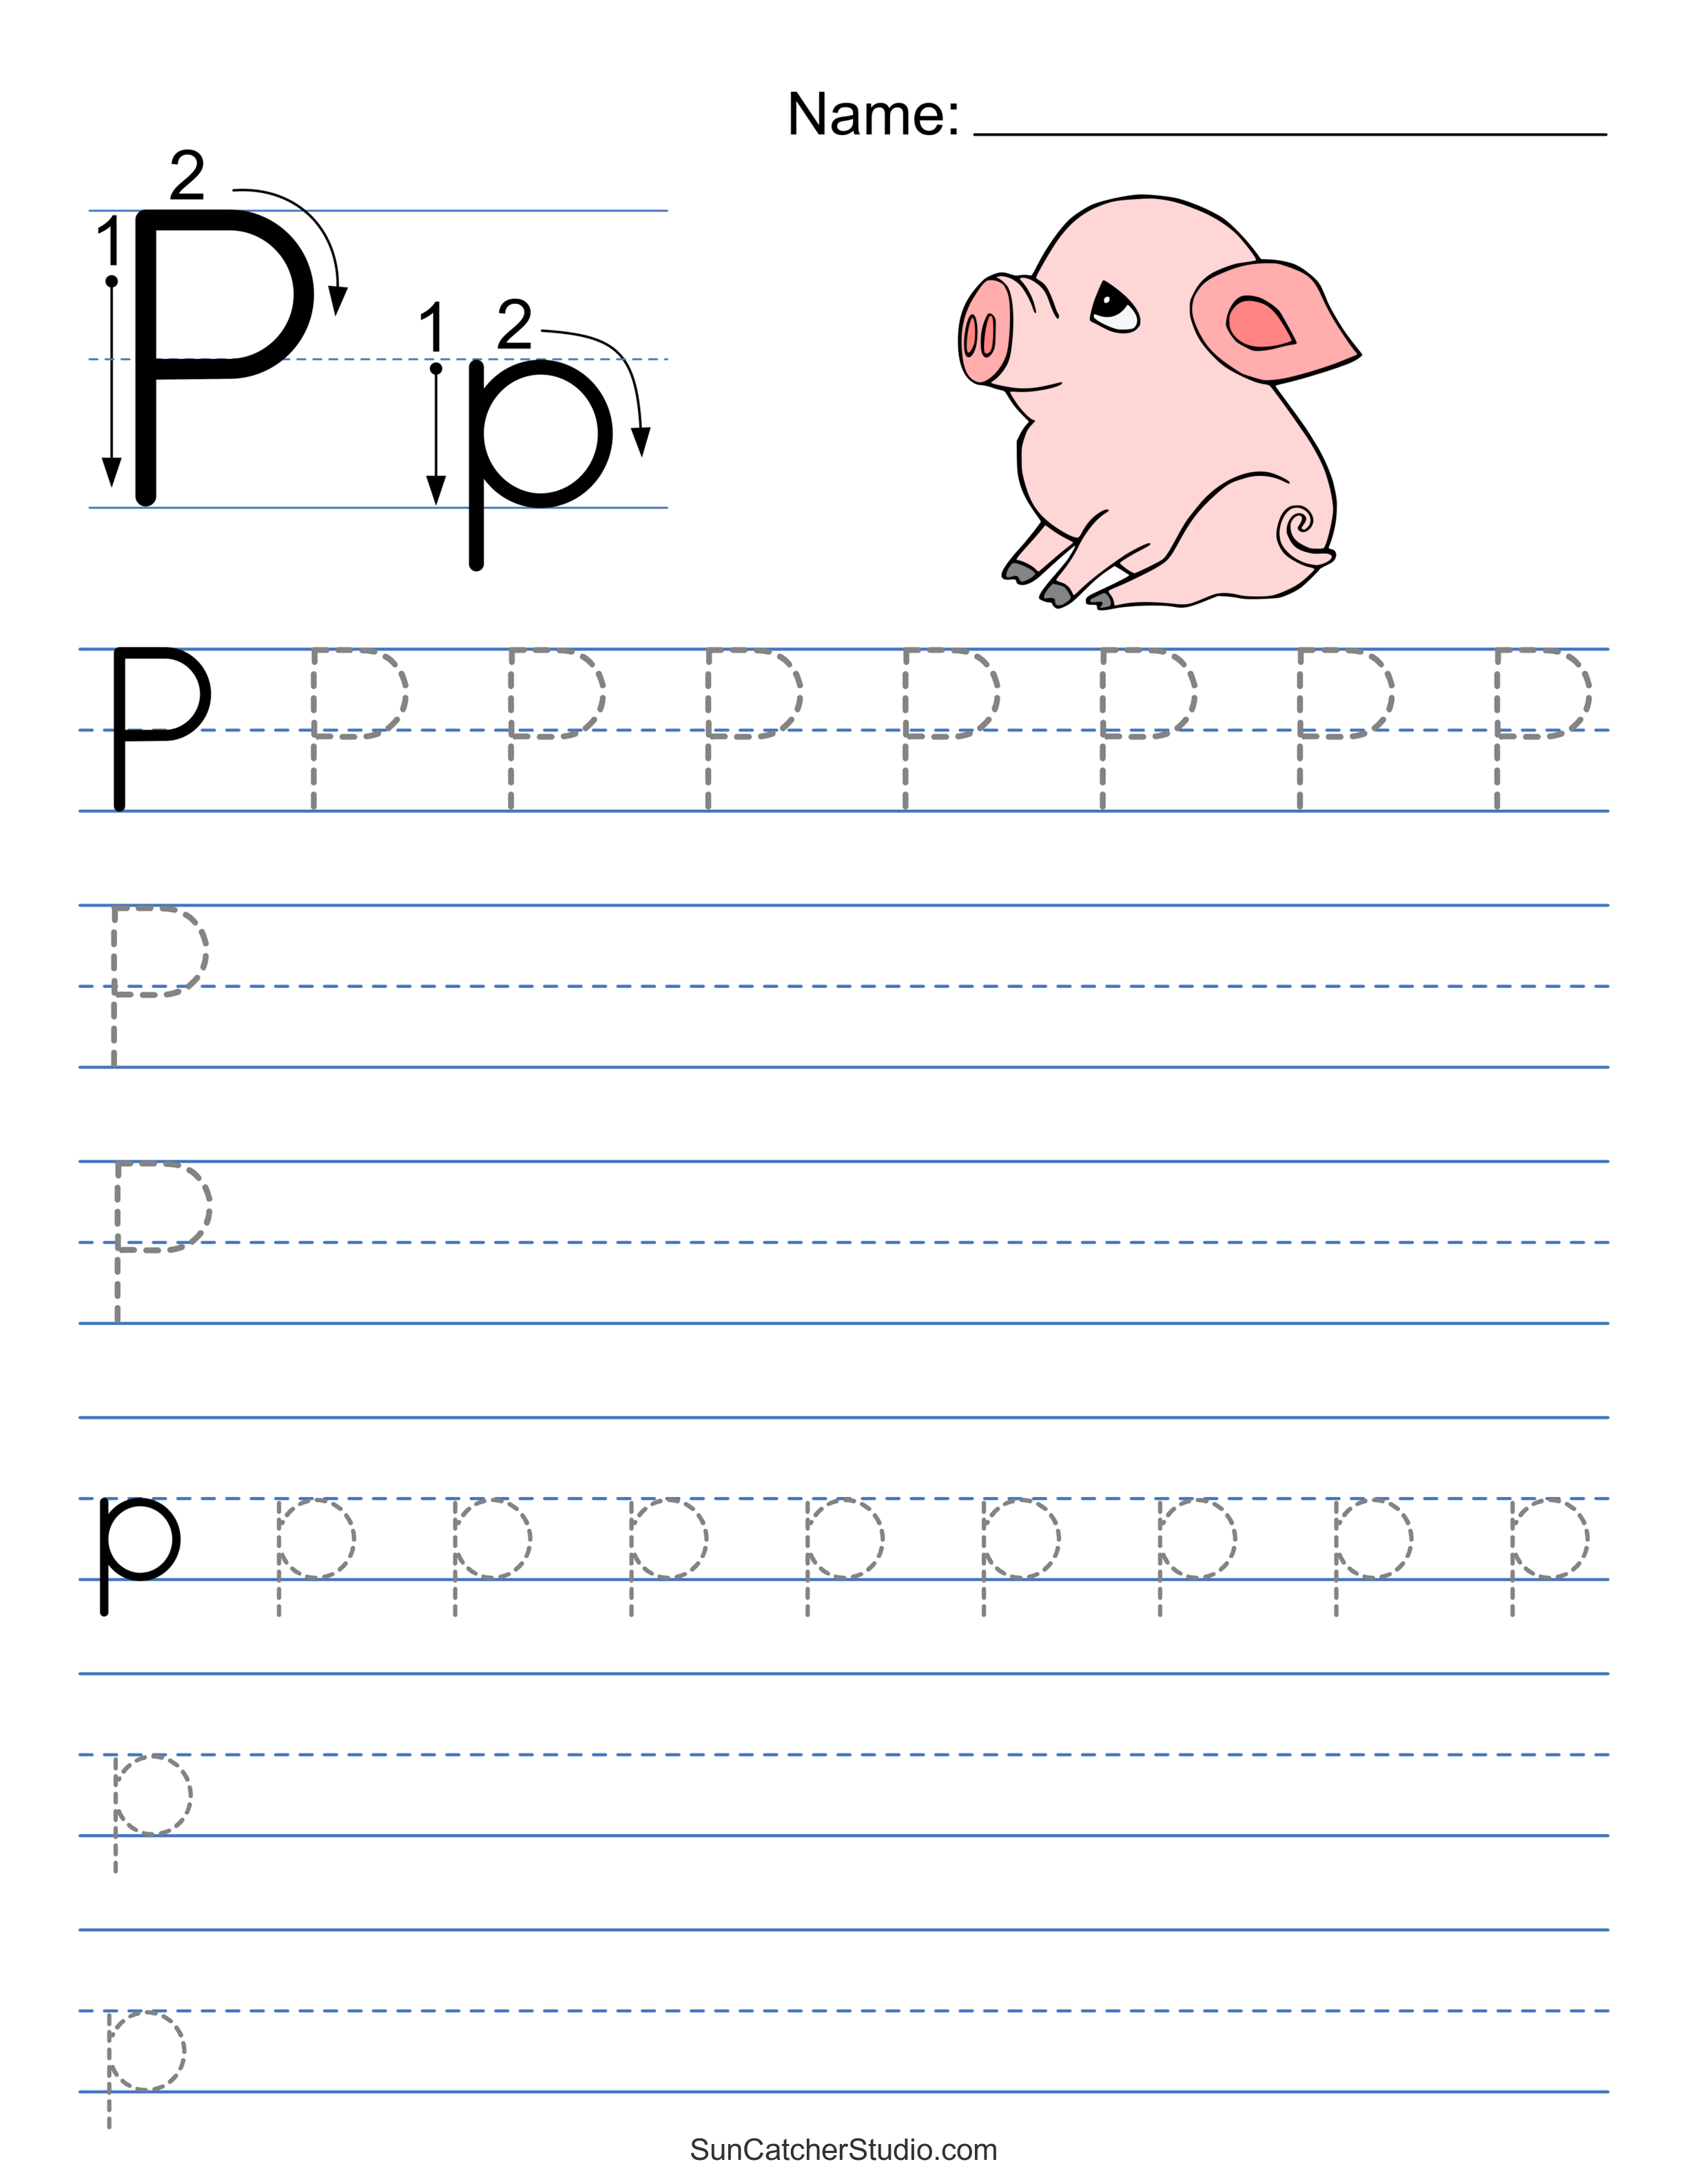
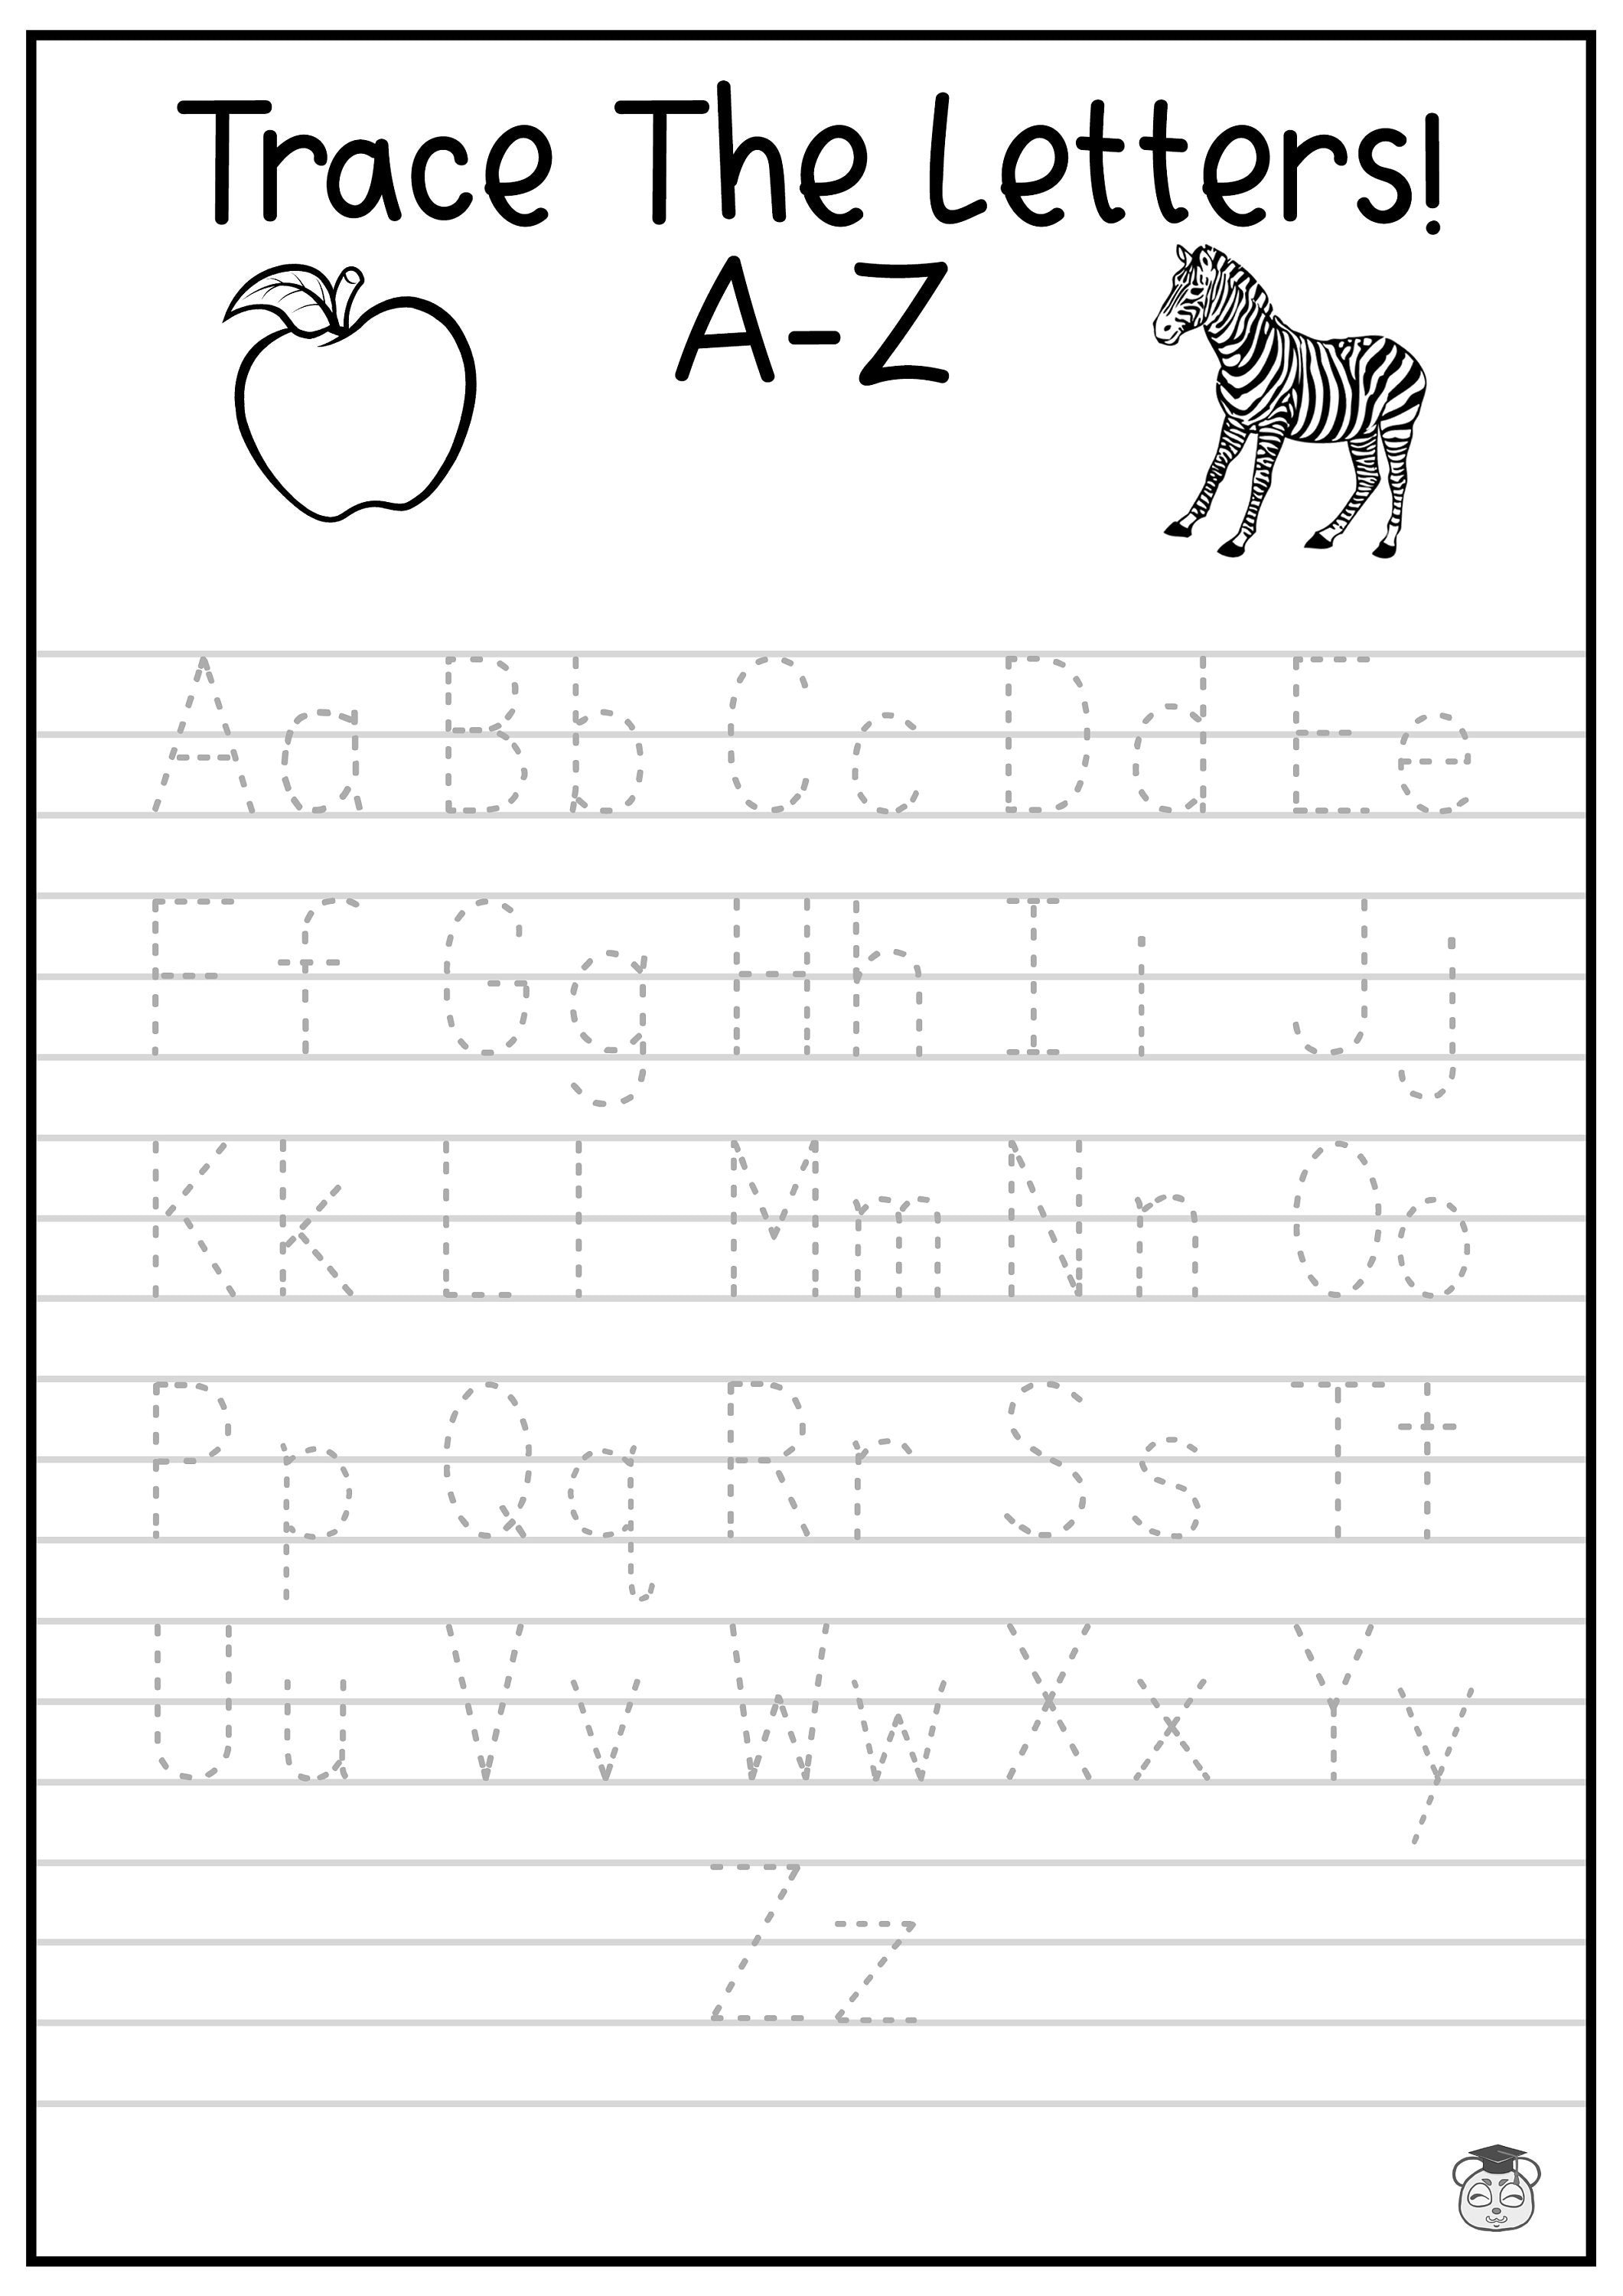
Here's what nobody tells you: the spacing between the dotted lines matters more than the cute clipart in the corner. I've seen worksheets where the tracing paths are so narrow that a child's natural pencil stroke bleeds over both lines, creating frustration and sloppy habits. And yes, that actually matters for developing fine motor control. A good tracing sheet should have wide, clear paths with a starting dot and directional arrows. If the worksheet expects a five-year-old to trace a perfect zigzag line in a space smaller than their pinky finger, toss it. You want the child to succeed on the first three traces, then build confidence to attempt the letter independently. That gradual release of responsibility is the secret sauce, and most free printables ignore it completely.
What to Look for in a Quality Tracing Resource
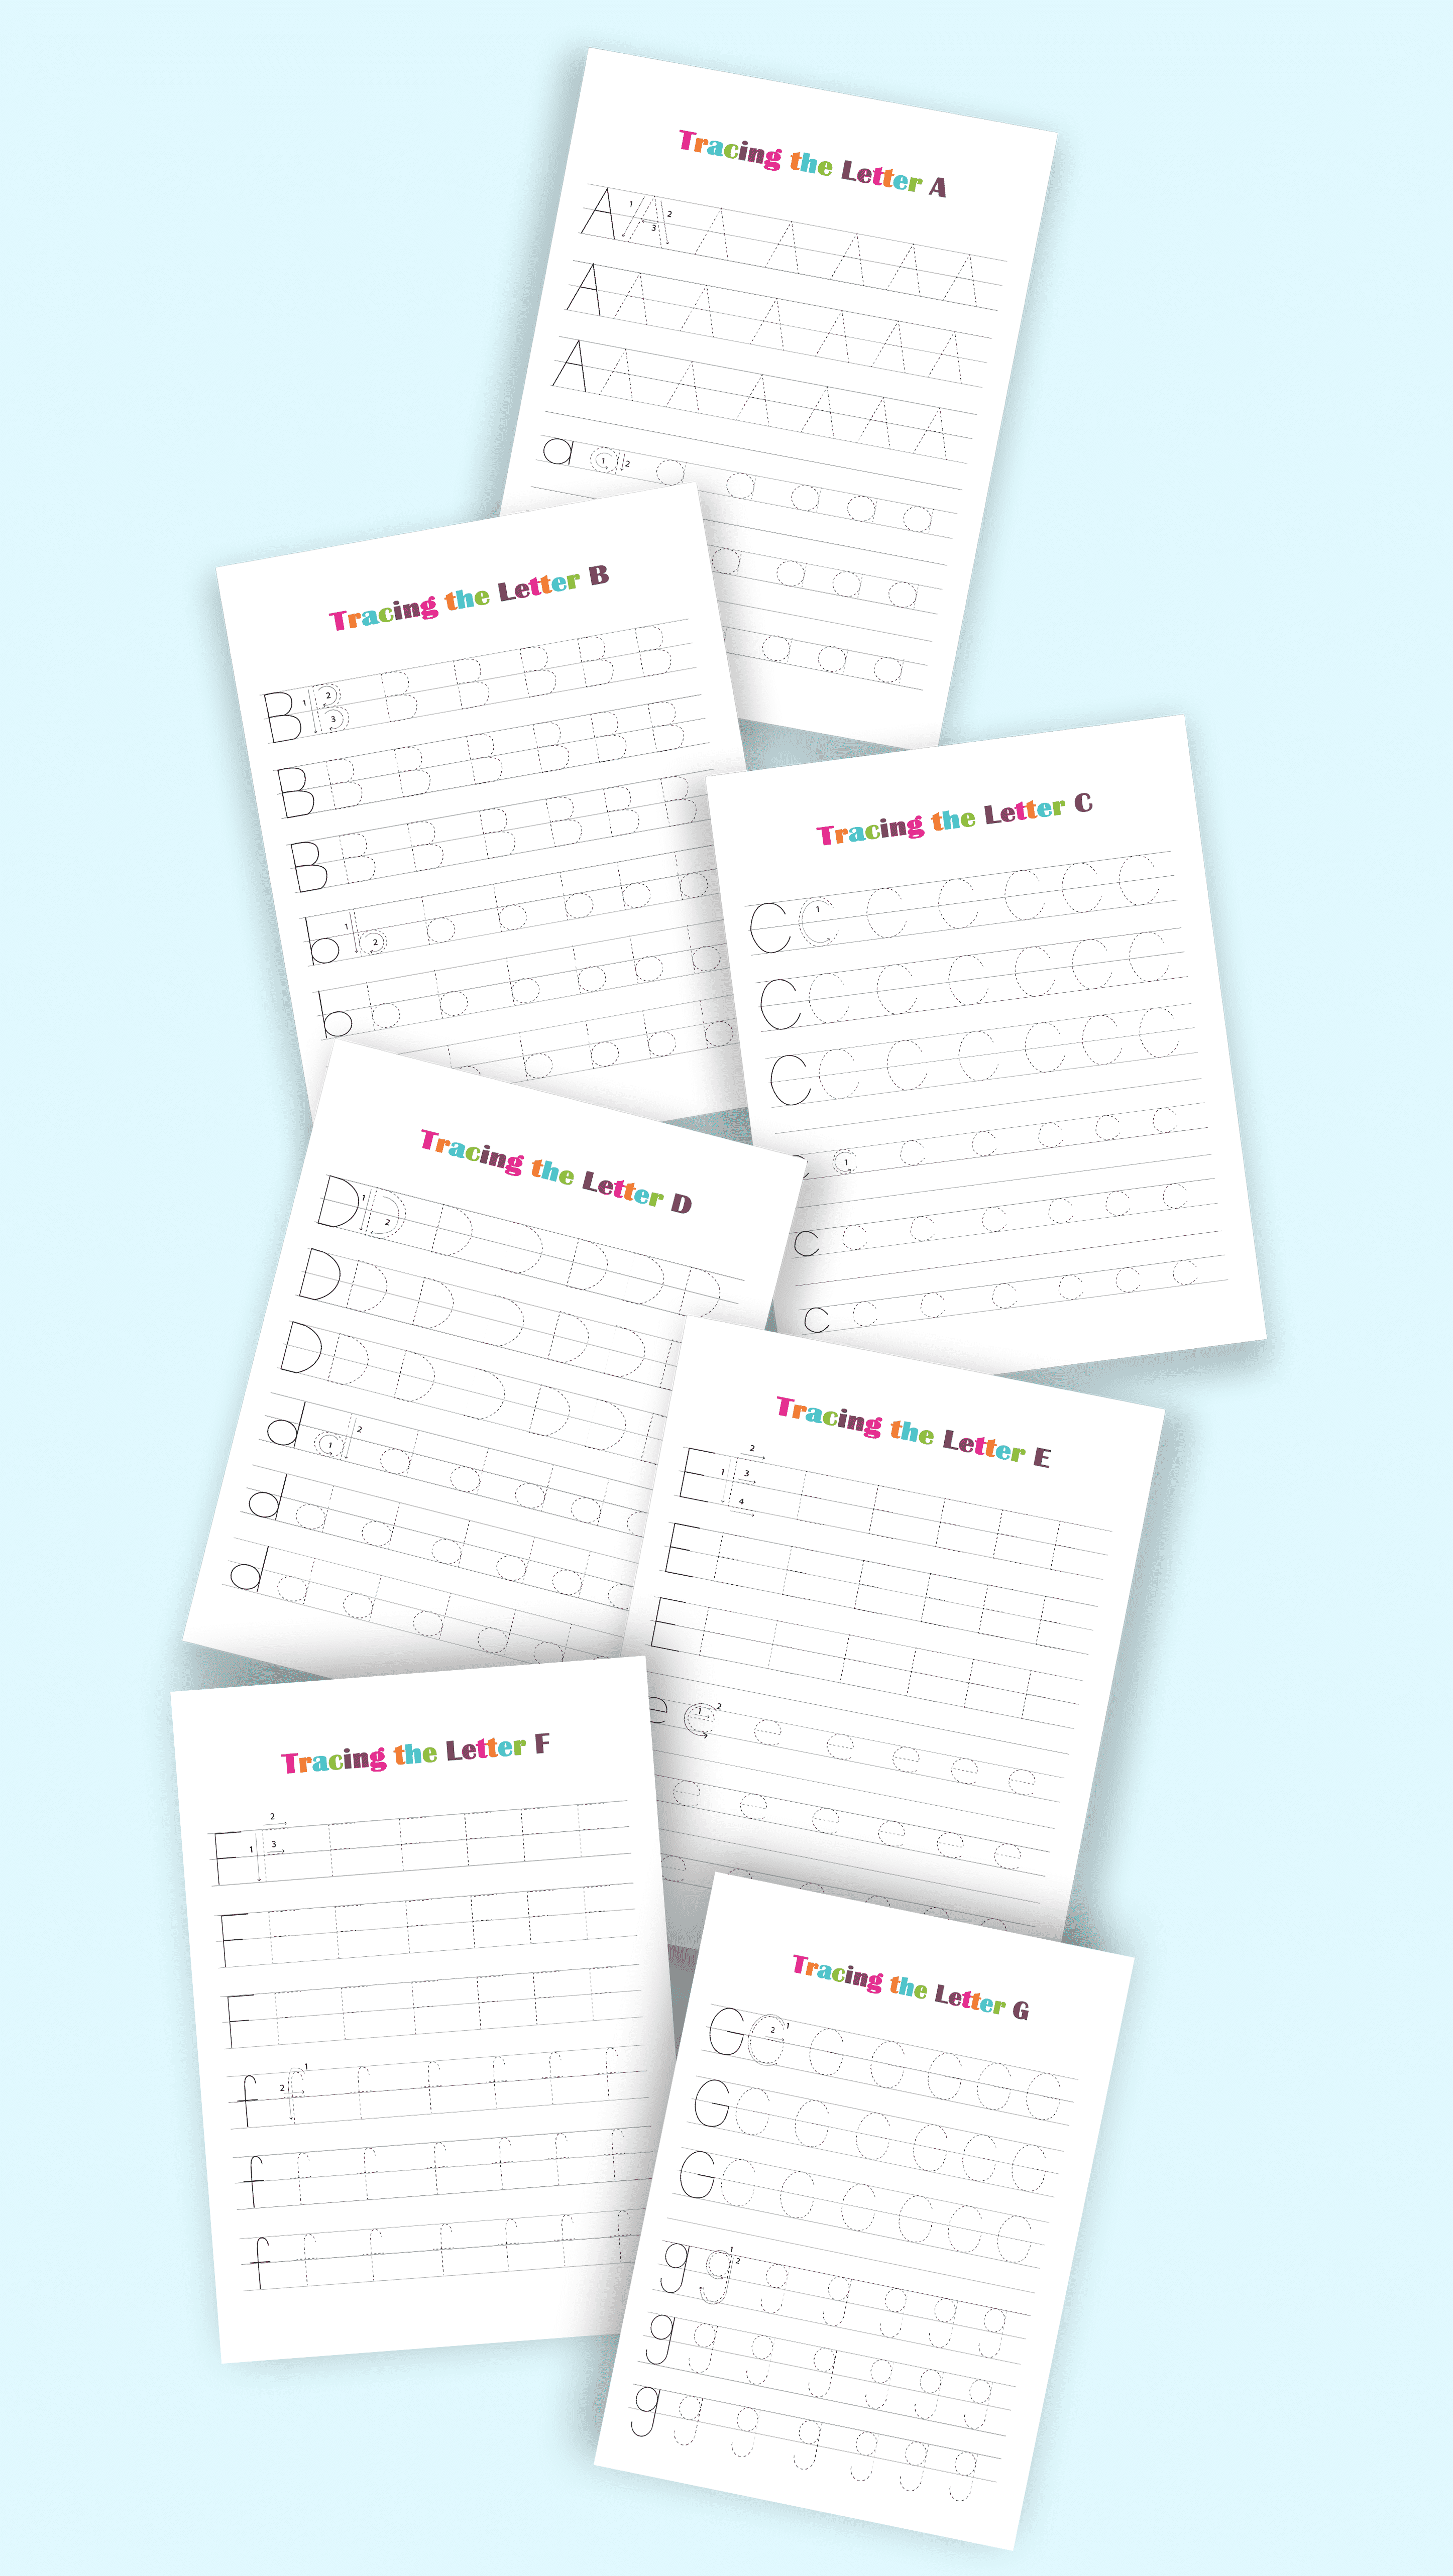
Not all tracing sheets are created equal. The best ones follow a three-step progression: first, a large model letter with a numbered stroke sequence. Second, a row of lighter gray letters for the child to trace over — these should fade slightly in intensity toward the end of the row. Third, a blank space where the child writes the letter from memory. This structure teaches the brain to visualize the shape before the hand commits. Skip any worksheet that crams twenty traces on one page without a single freehand attempt. That's busywork, not learning.
How to Turn a Single Page Into a Week of Practice
One actionable tip that changed everything for my own kids: cut the worksheet into strips. Don't hand a child an entire page of thirty letters to trace. That's overwhelming. Instead, give them three strips per day — one for the uppercase letter, one for the lowercase, and one for a simple word that starts with that letter. This keeps the practice session under five minutes, which is the sweet spot for attention spans. Five focused minutes beats thirty distracted minutes every single time. You can also laminate the strips and use dry-erase markers for repeated practice. Suddenly, that single printable worksheets letter tracing resource becomes reusable for an entire classroom or sibling group.
When to Push and When to Pause
Watch for the telltale signs of fatigue: white knuckles on the pencil, hunched shoulders, or a sudden increase in reversals. When you see these, stop immediately. The brain is no longer learning; it's just fighting the paper. Come back in an hour or the next day. The best tracing sessions happen when the child is calm and the parent is patient. A frustrated child will memorize avoidance, not letter formation. If you notice the same letter causing trouble week after week, isolate that letter. Print a page with just that one letter in large, bold tracing paths. Sometimes the problem isn't the child — it's that the letter 'S' or 'Z' has a curve or angle their hand hasn't learned to navigate yet.
The Right Tool for the Right Stage of Development
I've organized the most common tracing approaches into a quick reference table. This isn't exhaustive, but it covers what actually works based on age and skill level. Use it to match the worksheet style to the child's current needs, not their grade level.
| Age / Stage | Best Tracing Approach | Common Mistake to Avoid |
|---|---|---|
| 3-4 years (Pre-writing) | Large zigzag and curve paths, no letters yet | Forcing alphabet tracing before hand strength is ready |
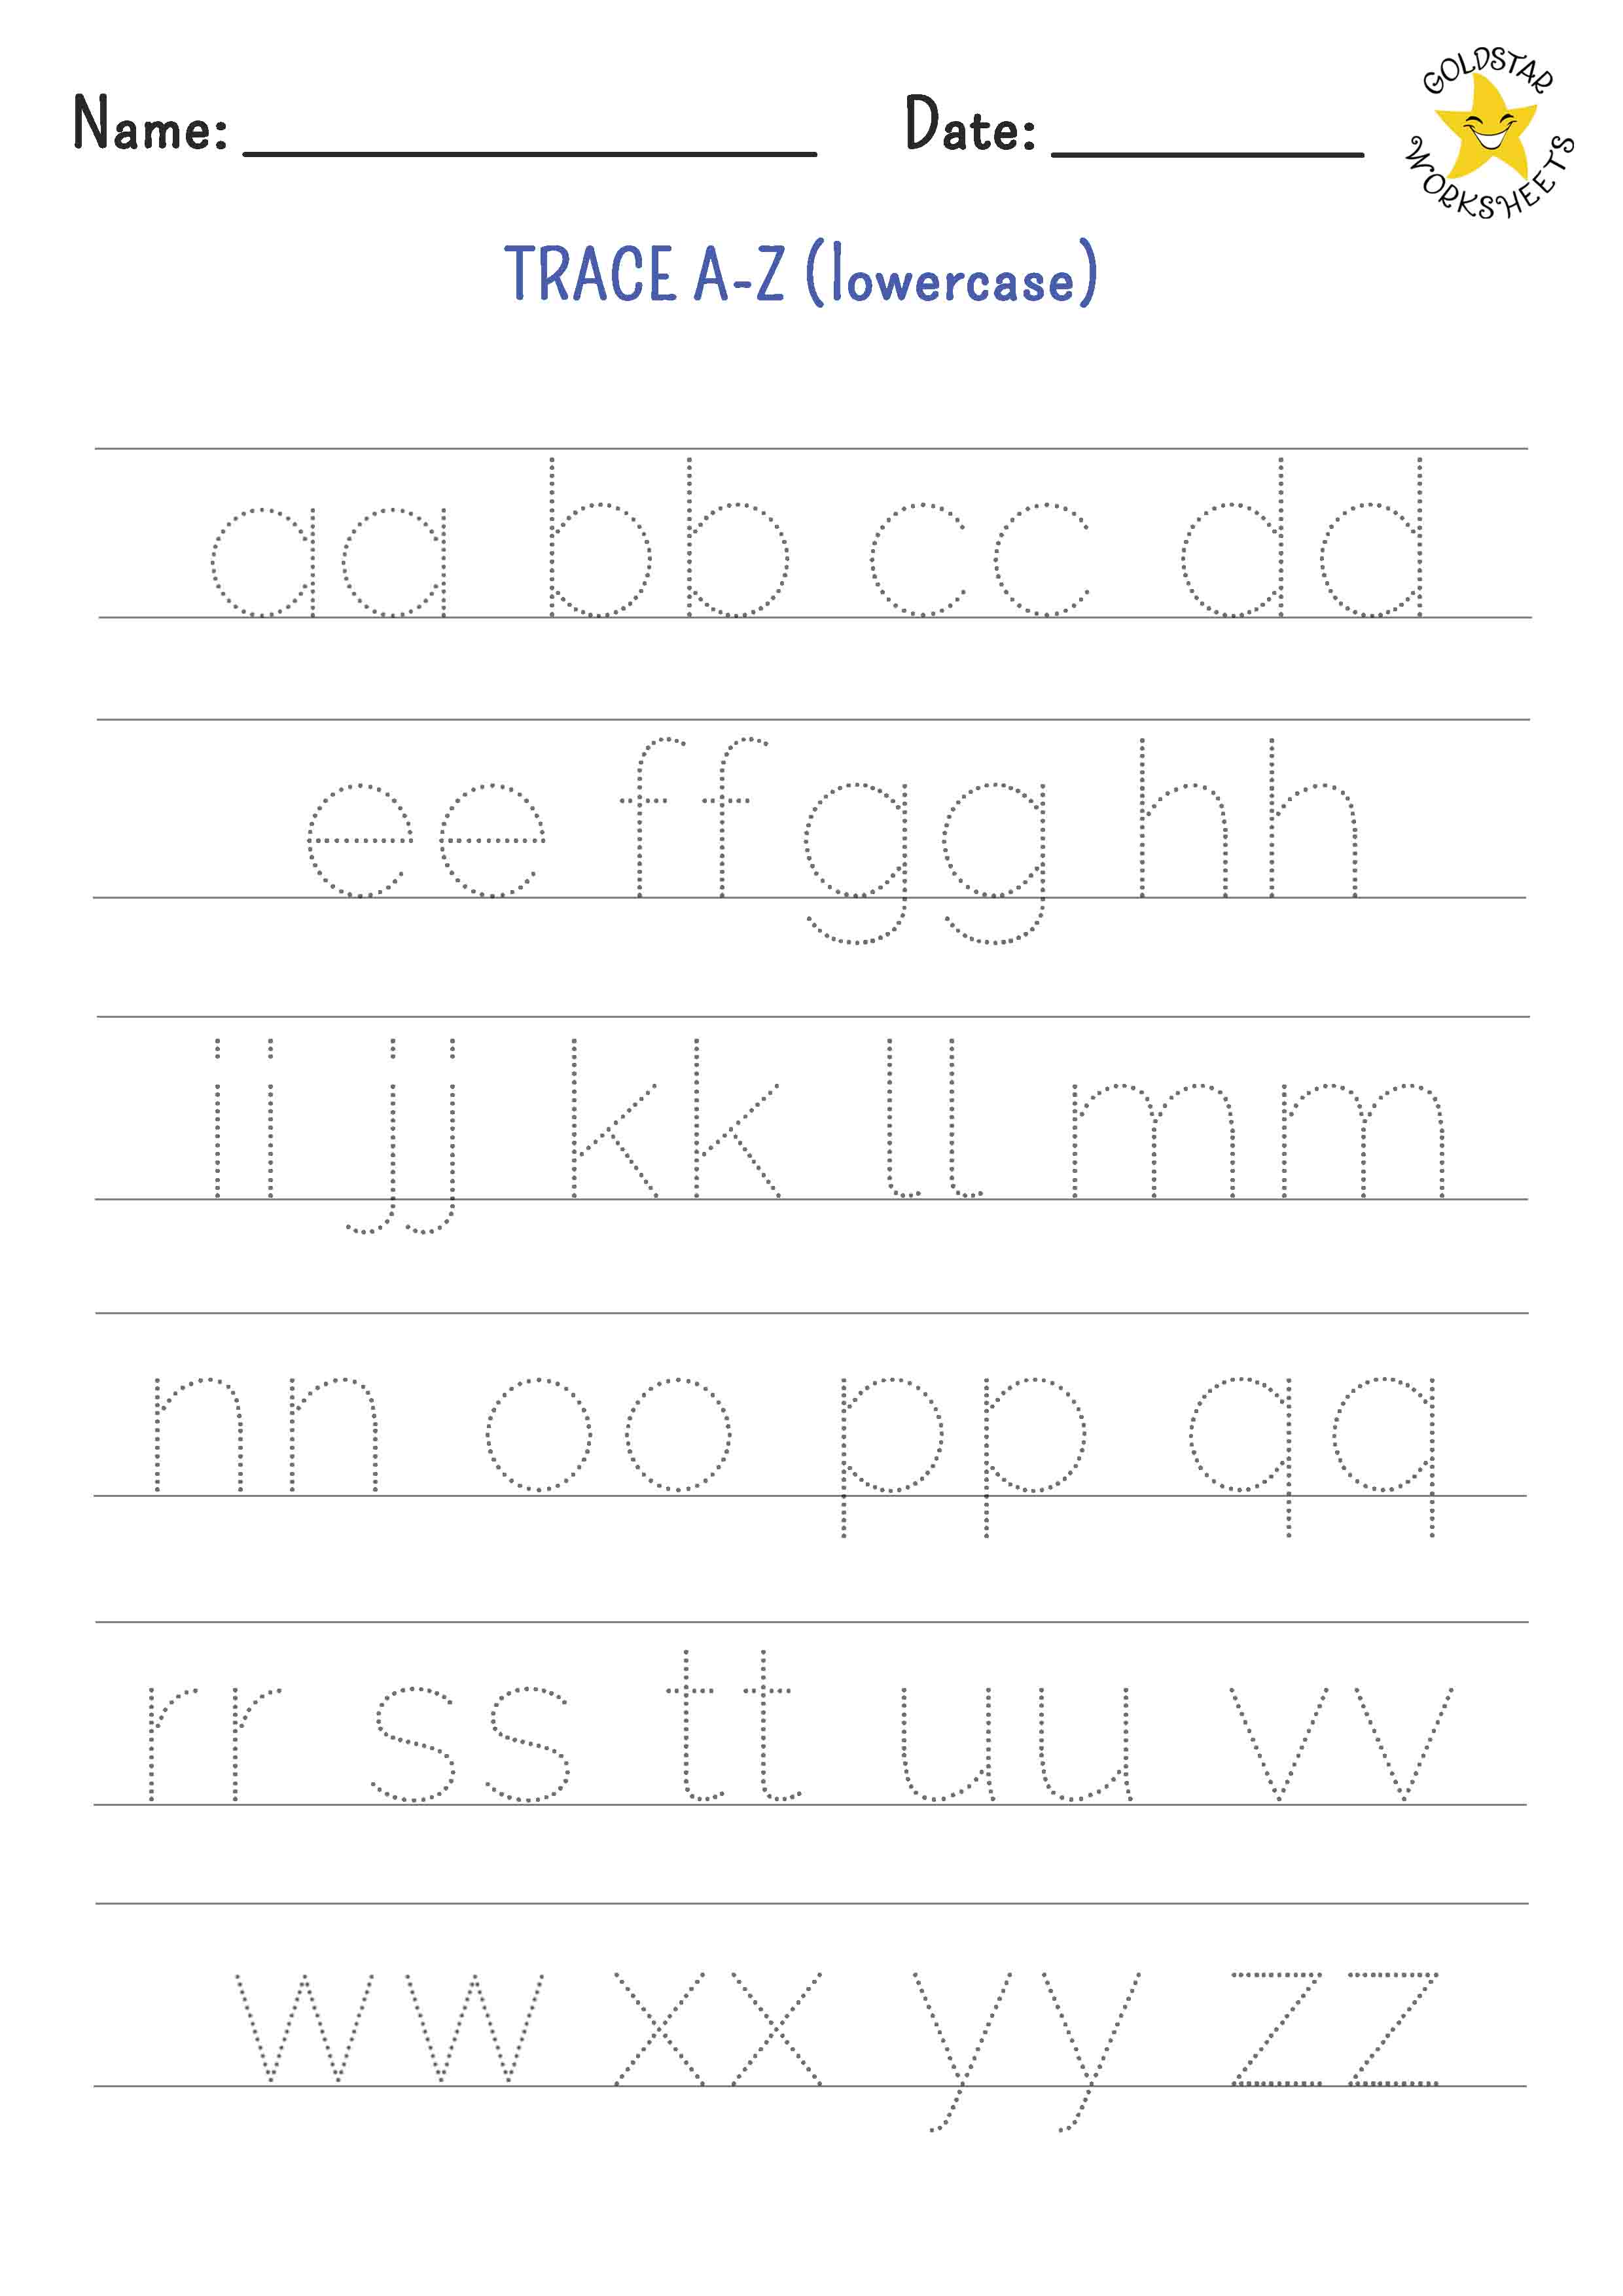
| 4-5 years (Letter introduction) | Single letter per page, dotted with arrows | Using uppercase-only worksheets — start with lowercase |
| 5-6 years (Building fluency) | Fading traces with freehand space at the end | Skipping the freehand row; always include it |
| 6-7 years (Remediation) | Isolated problem letters in large format | Moving on before the letter is automatic |
What this table reveals is that the printable worksheets letter tracing you choose must match the child's current hand development, not just their age. A four-year-old with strong fine motor skills might be ready for lowercase 'l' and 'i', while a six-year-old who avoided writing might need to go back to pre-writing curves. There is no shame in that. Handwriting is a physical skill, and every child's hand develops on its own timeline. The worksheets are just the map — the child's hand does the real traveling.
One Last Thing Before You Go
Every letter a child traces is more than a line on a page—it’s a small victory in a world that demands patience, focus, and confidence. These tiny triumphs stack up, shaping not just handwriting skills but a mindset that says, I can figure this out. In a time when screens pull attention in a thousand directions, the simple act of guiding a pencil along a dotted path anchors a child in something real. That quiet focus doesn’t just build better letters; it builds a foundation for every lesson to come.
Maybe you’re wondering if you have the time or the patience to sit down and guide this process. Let that doubt go. You don’t need to be a teacher or a perfectionist. You just need to show up for five minutes, pick a sheet that feels right, and let the moment unfold. The beauty of printable worksheets letter tracing is that they meet you exactly where you are—no prep, no pressure, just a chance to connect. The child doesn’t care if the lines are perfectly straight; they care that you’re there, celebrating each shaky attempt.
So before you click away, take one small step. Bookmark this page so you can return whenever the moment strikes. Or better yet, print a sheet right now and leave it on the kitchen table for tomorrow morning. If you know another parent, teacher, or caregiver who’s wrestling with wiggly kids and wobbly pencils, share this with them. Printable worksheets letter tracing are a quiet gift—one that keeps giving every time a small hand picks up a crayon. Your next step is the simplest one: just start.