You've probably got a stack of half-finished scissor practice sheets somewhere, covered in frustrated tears and mangled paper. Here's the thing — most parents are handed preschool worksheets cutting activities and told "this builds fine motor skills," but nobody explains why your kid refuses to touch them, or why the results look like a tornado hit a craft store. That's not your fault. It's the worksheet's fault.
Look — right now, your child is at a stage where every snip of the scissors is literally wiring their brain for handwriting, buttoning shirts, and even holding a pencil correctly in kindergarten. But if the cutting tasks feel like chores instead of play? They'll fight you. And honestly, I've seen too many parents give up entirely, assuming their kid "just isn't ready." The truth is, most commercial cutting worksheets are designed by people who haven't sat with a three-year-old for more than five minutes. They don't account for grip issues, paper thickness, or the fact that a straight line is boring.
What you're about to find here is the stuff I wish someone had told me ten years ago. Not generic tips — actual strategies that make those worksheets work without the meltdowns. I'll show you why the typical advice (like "just practice more") backfires, and what to swap in instead. By the end, you'll know exactly which cutting activities actually build the right muscles, and which ones to toss in the recycling bin. No fluff. Just what works.
Let me tell you something that took me years of teaching preschool to understand: handing a three-year-old a pair of scissors and a piece of paper is not just about keeping them busy. It's about wiring their brain for success in ways most parents never see. The real magic of scissor practice isn't the finished snowflake or the crooked star shape—it's the profound neurological workout happening in those tiny hands.
Why Cutting Practice Builds More Than Just Craft Skills
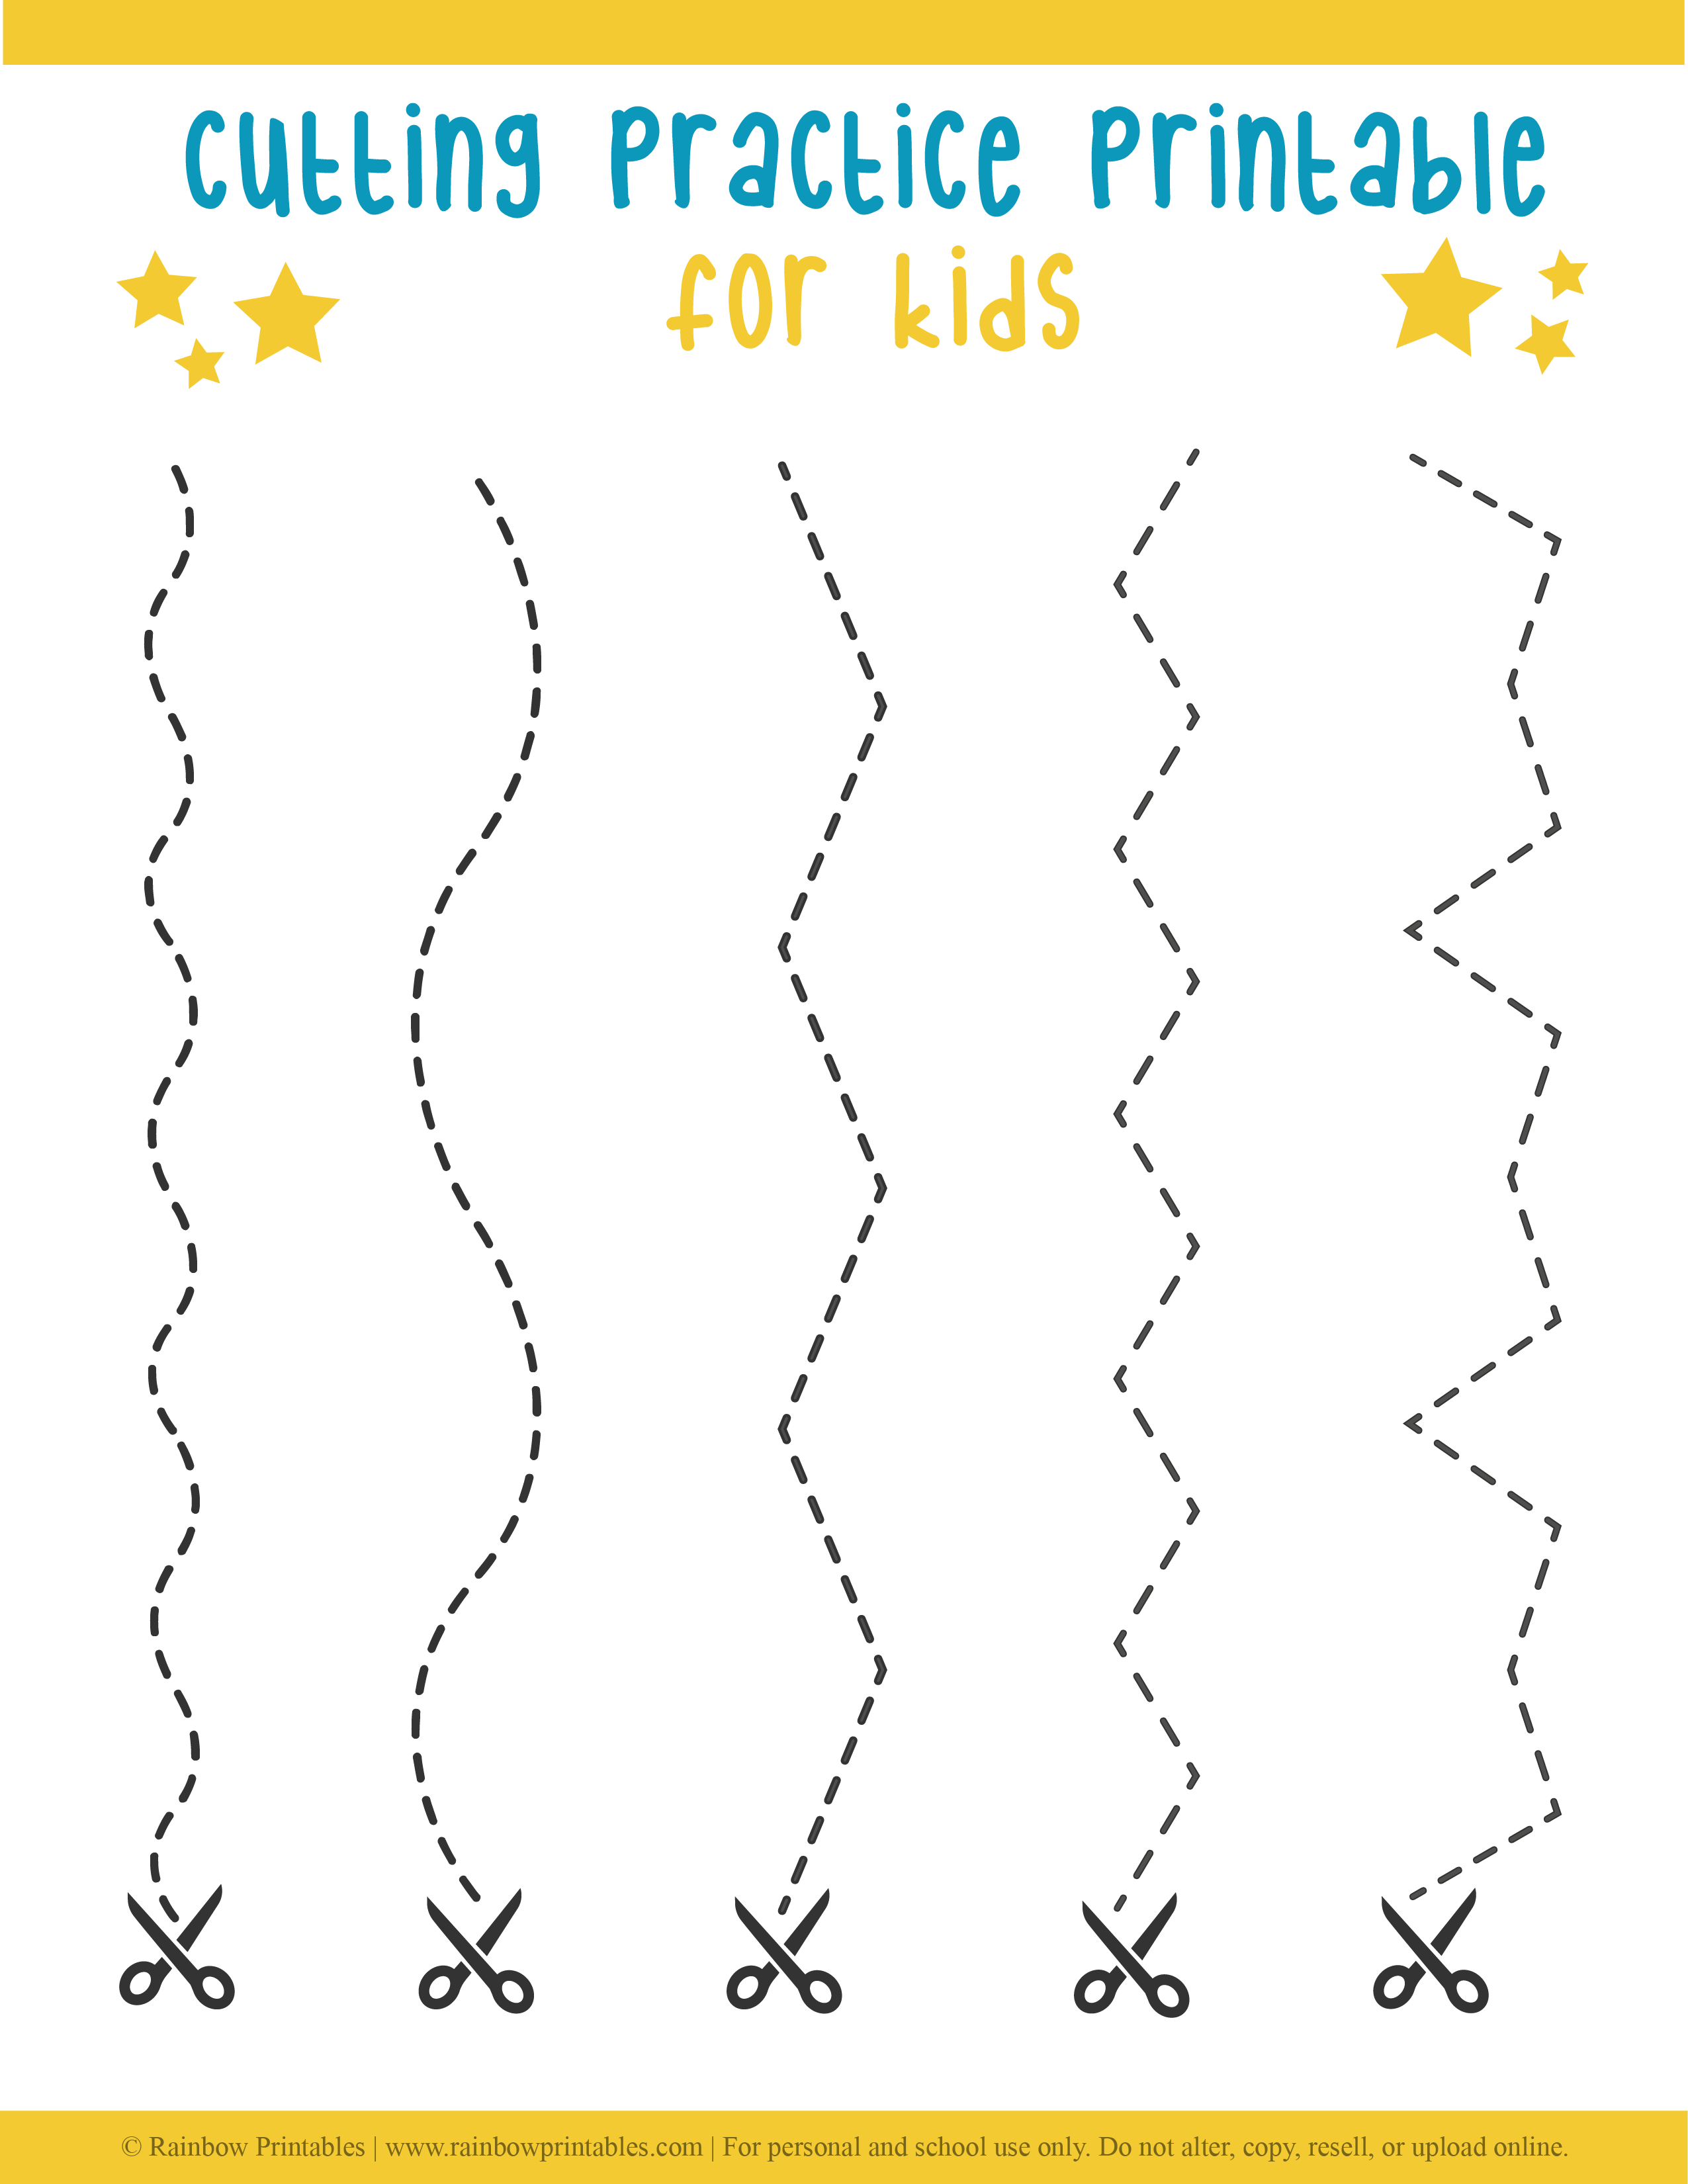
Here's what nobody tells you about preschool worksheets cutting: the act of opening and closing scissors forces a child's hand to develop the same muscles they'll need for holding a pencil. I've watched dozens of kids struggle with writing, and in nearly every case, the root cause traces back to weak hand muscles that never got enough scissor time. Yes, it really is that foundational. When you give a child a pair of safety scissors and a simple line to follow, you're asking their brain to coordinate vision, fine motor control, and spatial awareness simultaneously. That's a heavy cognitive lift for a four-year-old. The best cutting activities don't just ask kids to snip randomly—they present a clear visual boundary, like a dashed line or a thick black curve. This teaches impulse control. They have to stop before the line ends. They have to slow down. In an era of constant screen stimulation, that deliberate, focused hand movement is becoming rare, and our kids are paying the price.
Most parents grab the first packet of scissor worksheets they find online, print thirty pages, and wonder why their child gets bored after two. The secret is variety within structure. You want a mix of straight lines, zigzags, gentle curves, and eventually simple shapes. But here's the actionable tip: start with paper that has a faint colored line on one side only. Kids get overwhelmed by dual lines or complex instructions. A single red line down the middle of a page? That's all they need. Let them succeed at that before you introduce preschool worksheets cutting with multiple elements. I've seen children go from refusing to touch scissors to cutting for twenty minutes straight, simply because the task felt manageable.
The Three Types of Cutting Worksheets That Actually Work
Not all cutting practice is created equal. After testing dozens of approaches in my own classroom, I've narrowed it down to three formats that deliver real results. First, the single-stroke snipping strip: a narrow rectangle of paper with one thick line across it. The child makes one cut, and they're done. This builds confidence instantly. Second, the continuous path worksheet—think of it like a road for the scissors to follow. These are excellent for developing sustained attention because the child must track the line from start to finish without lifting the blades. Third, and this is my personal favorite, the shape-outline page where kids cut around a simple object like an apple or a fish. This introduces the concept of turning the paper, not just the scissors, which is a huge cognitive leap.
What the Research Says About Scissor Grip and Hand Dominance
Here's a detail most guides skip: the way a child holds the scissors matters more than the worksheet itself. I've seen kids develop terrible habits—scissors pointing upward, thumb not in the loop, the paper flopping around—that no worksheet can fix. The research is clear: proper scissor grip transfers directly to pencil grip. The thumb should be on top, in the smaller loop, with the fingers in the larger loop. If your child is using preschool worksheets cutting but holding the scissors upside down, stop everything and fix the grip first. It takes five minutes of modeling. Also, don't force hand dominance. Let them try with both hands. I've taught left-handed kids who struggled for months because every worksheet assumed right-handed cutting. If that's your child, flip the paper over or find left-handed scissors. It makes a world of difference.
How to Structure a 10-Minute Cutting Session
You don't need an hour. You need ten focused minutes. Start with a warm-up—let them snip playdough or strips of cardstock. This loosens the hand. Then move to one worksheet, and only one. Quality over quantity every single time. If they finish in three minutes, great. If they struggle for eight, even better—that's effort building strength. End with a free-cut session where they can snip anything (old magazines, junk mail, scrap paper). This removes the pressure of perfection. I've seen more progress from five minutes of free snipping than from thirty minutes of forced worksheet completion. The key is consistency: three to four sessions per week, not a marathon once a month.
| Worksheet Type | Best Age | Skill Developed | Session Length |
|---|---|---|---|
| Single snipping strip | 2.5–3 years | Basic scissor control | 3–5 minutes |
| Continuous path line | 3–4 years | Visual tracking & focus | 5–8 minutes |
| Shape outline | 4–5 years | Spatial reasoning & turning | 8–12 minutes |
The truth is, most cutting worksheets on the market are either too easy or too hard. They skip the middle ground where real learning happens. That middle ground is where you want to live—challenging enough to engage the brain, simple enough to avoid tears. Watch your child's hand, not just the paper. If you see their thumb turning white from gripping too hard, the scissors are wrong or the paper is too thick. If they're cutting with their elbow up in the air, they're using shoulder muscles instead of hand muscles. Little adjustments like these turn a frustrating task into a skill they'll carry into kindergarten and beyond.
The Part Most People Skip
Here’s the truth nobody tells you about early childhood development: the real magic doesn’t happen when your child gets it right. It happens in the messy, crooked, frustrated moments when they want to give up. That’s where resilience is built. That’s where fine motor skills truly wire into the brain. You’re not just teaching a child how to use scissors—you’re teaching them how to face something hard and keep going. That skill will outlast every worksheet, every line they cut, and every craft project they ever complete. It shapes how they approach learning for the rest of their lives.
Maybe you’re worried you’re not doing it “right.” Maybe you think your child is too young, or too impatient, or that you don’t have the perfect setup. Let that worry go. You don’t need a Pinterest-perfect activity—you need a willing heart and a pair of safe scissors. The best progress happens in five-minute bursts on the kitchen floor, not in hour-long lessons. Your child doesn’t need you to be a teacher. They need you to be their cheerleader, their safe place to try again.
So here’s your next step: don’t let this sit in a bookmark folder. Go grab a pair of scissors right now. Print one page from our gallery. Sit down beside your little one and let them see you smile when the cut goes off the line. Share this page with another parent who’s wondering where to start. Because when you make space for small, imperfect wins with preschool worksheets cutting activities, you’re not just building skills—you’re building a child who believes they can figure it out. And that belief changes everything.