You've got a stack of worksheets and your preschooler is already bored. The truth is, most "educational" printables are just busywork in disguise. But here's the thing: when you use preschool worksheets big and small the right way, you're not just teaching size comparison — you're wiring their brain for early math logic. That's not fluff. That's neuroscience.
Right now, your child is probably pointing at everything and asking "what's that?" That curiosity is a ticking clock. Miss this window and the concept of "bigger than" or "smaller than" becomes abstract and confusing. Look — I've seen four-year-olds cry over a simple worksheet because the pictures were too cluttered or the concept wasn't introduced playfully. It doesn't have to be that way. Honestly, the difference between a meltdown and a breakthrough is often just one well-designed activity.
So what's coming? I'll show you exactly how to pick worksheets that actually teach — not just fill time. We'll talk about the one common mistake parents make that turns a fun activity into a frustrating chore. And I'll share a few sneaky tricks to turn any printable into a hands-on game your kid will beg to play again. No fluff. No jargon. Just real strategies that work with your actual wiggly, distractible child.
Every parent and early childhood educator eventually stumbles into the same frustrating paradox: you want to teach size comparison, but the toddler in front of you would rather eat the worksheet than compare anything on it. Here's what nobody tells you about this specific skill: the concept of "big" and "small" is deceptively complex for a three-year-old brain. It requires visual discrimination, vocabulary retention, and the ability to hold two objects in working memory simultaneously. Most printable activities skip right past the foundational work and expect kids to circle the "big" bear without ever letting them physically handle two bears of different sizes first.
Why Size Discrimination Matters More Than You Think
Before you print another stack of pages, consider this: size comparison is a pre-math skill that directly predicts later sorting and measurement abilities. Children who struggle to identify which object is larger often face difficulty with patterns, sequencing, and even early addition when they hit kindergarten. The problem is that many resources treat this like a simple vocabulary lesson. It is not. It is a visual-spatial workout that demands repetition across different contexts. A child might nail "big" when comparing a beach ball to a marble, but completely freeze when asked to compare two slightly different-sized apples. This is where targeted practice with varied imagery becomes non-negotiable.
What Most Worksheets Get Wrong About Comparison
I have reviewed hundreds of printable sets over my career, and the single biggest mistake is using abstract or inconsistent sizing. You will see a page with a tiny elephant next to a giant mouse, which completely undermines the real-world logic you are trying to teach. Children need clear, obvious size differences that mirror actual proportions. A whale should be bigger than a fish. A button should be smaller than a coat. When the comparisons are absurd, the learning becomes confused. The best activities use real-world objects with a minimum 2:1 size ratio between the "big" and "small" items. Anything less than that, and you are testing eyesight, not understanding.
How to Structure a Single Worksheet Session
Here is the actionable tip that changed how I teach this concept entirely: always start with a concrete sorting task before the worksheet ever hits the table. Grab three pairs of objects from your kitchen—two spoons (one large serving spoon, one small teaspoon), two cups, and two books. Let the child physically hand you the "big" spoon. Then the "small" cup. Do this for three minutes. Only then introduce the printed page. When you use preschool worksheets big and small concepts this way, the paper becomes a reinforcement tool, not the primary teacher. The worksheet should feel like a game of "show me what you know," not a cold test of an unfamiliar idea.
The Real Secret to Keeping Their Attention on the Page
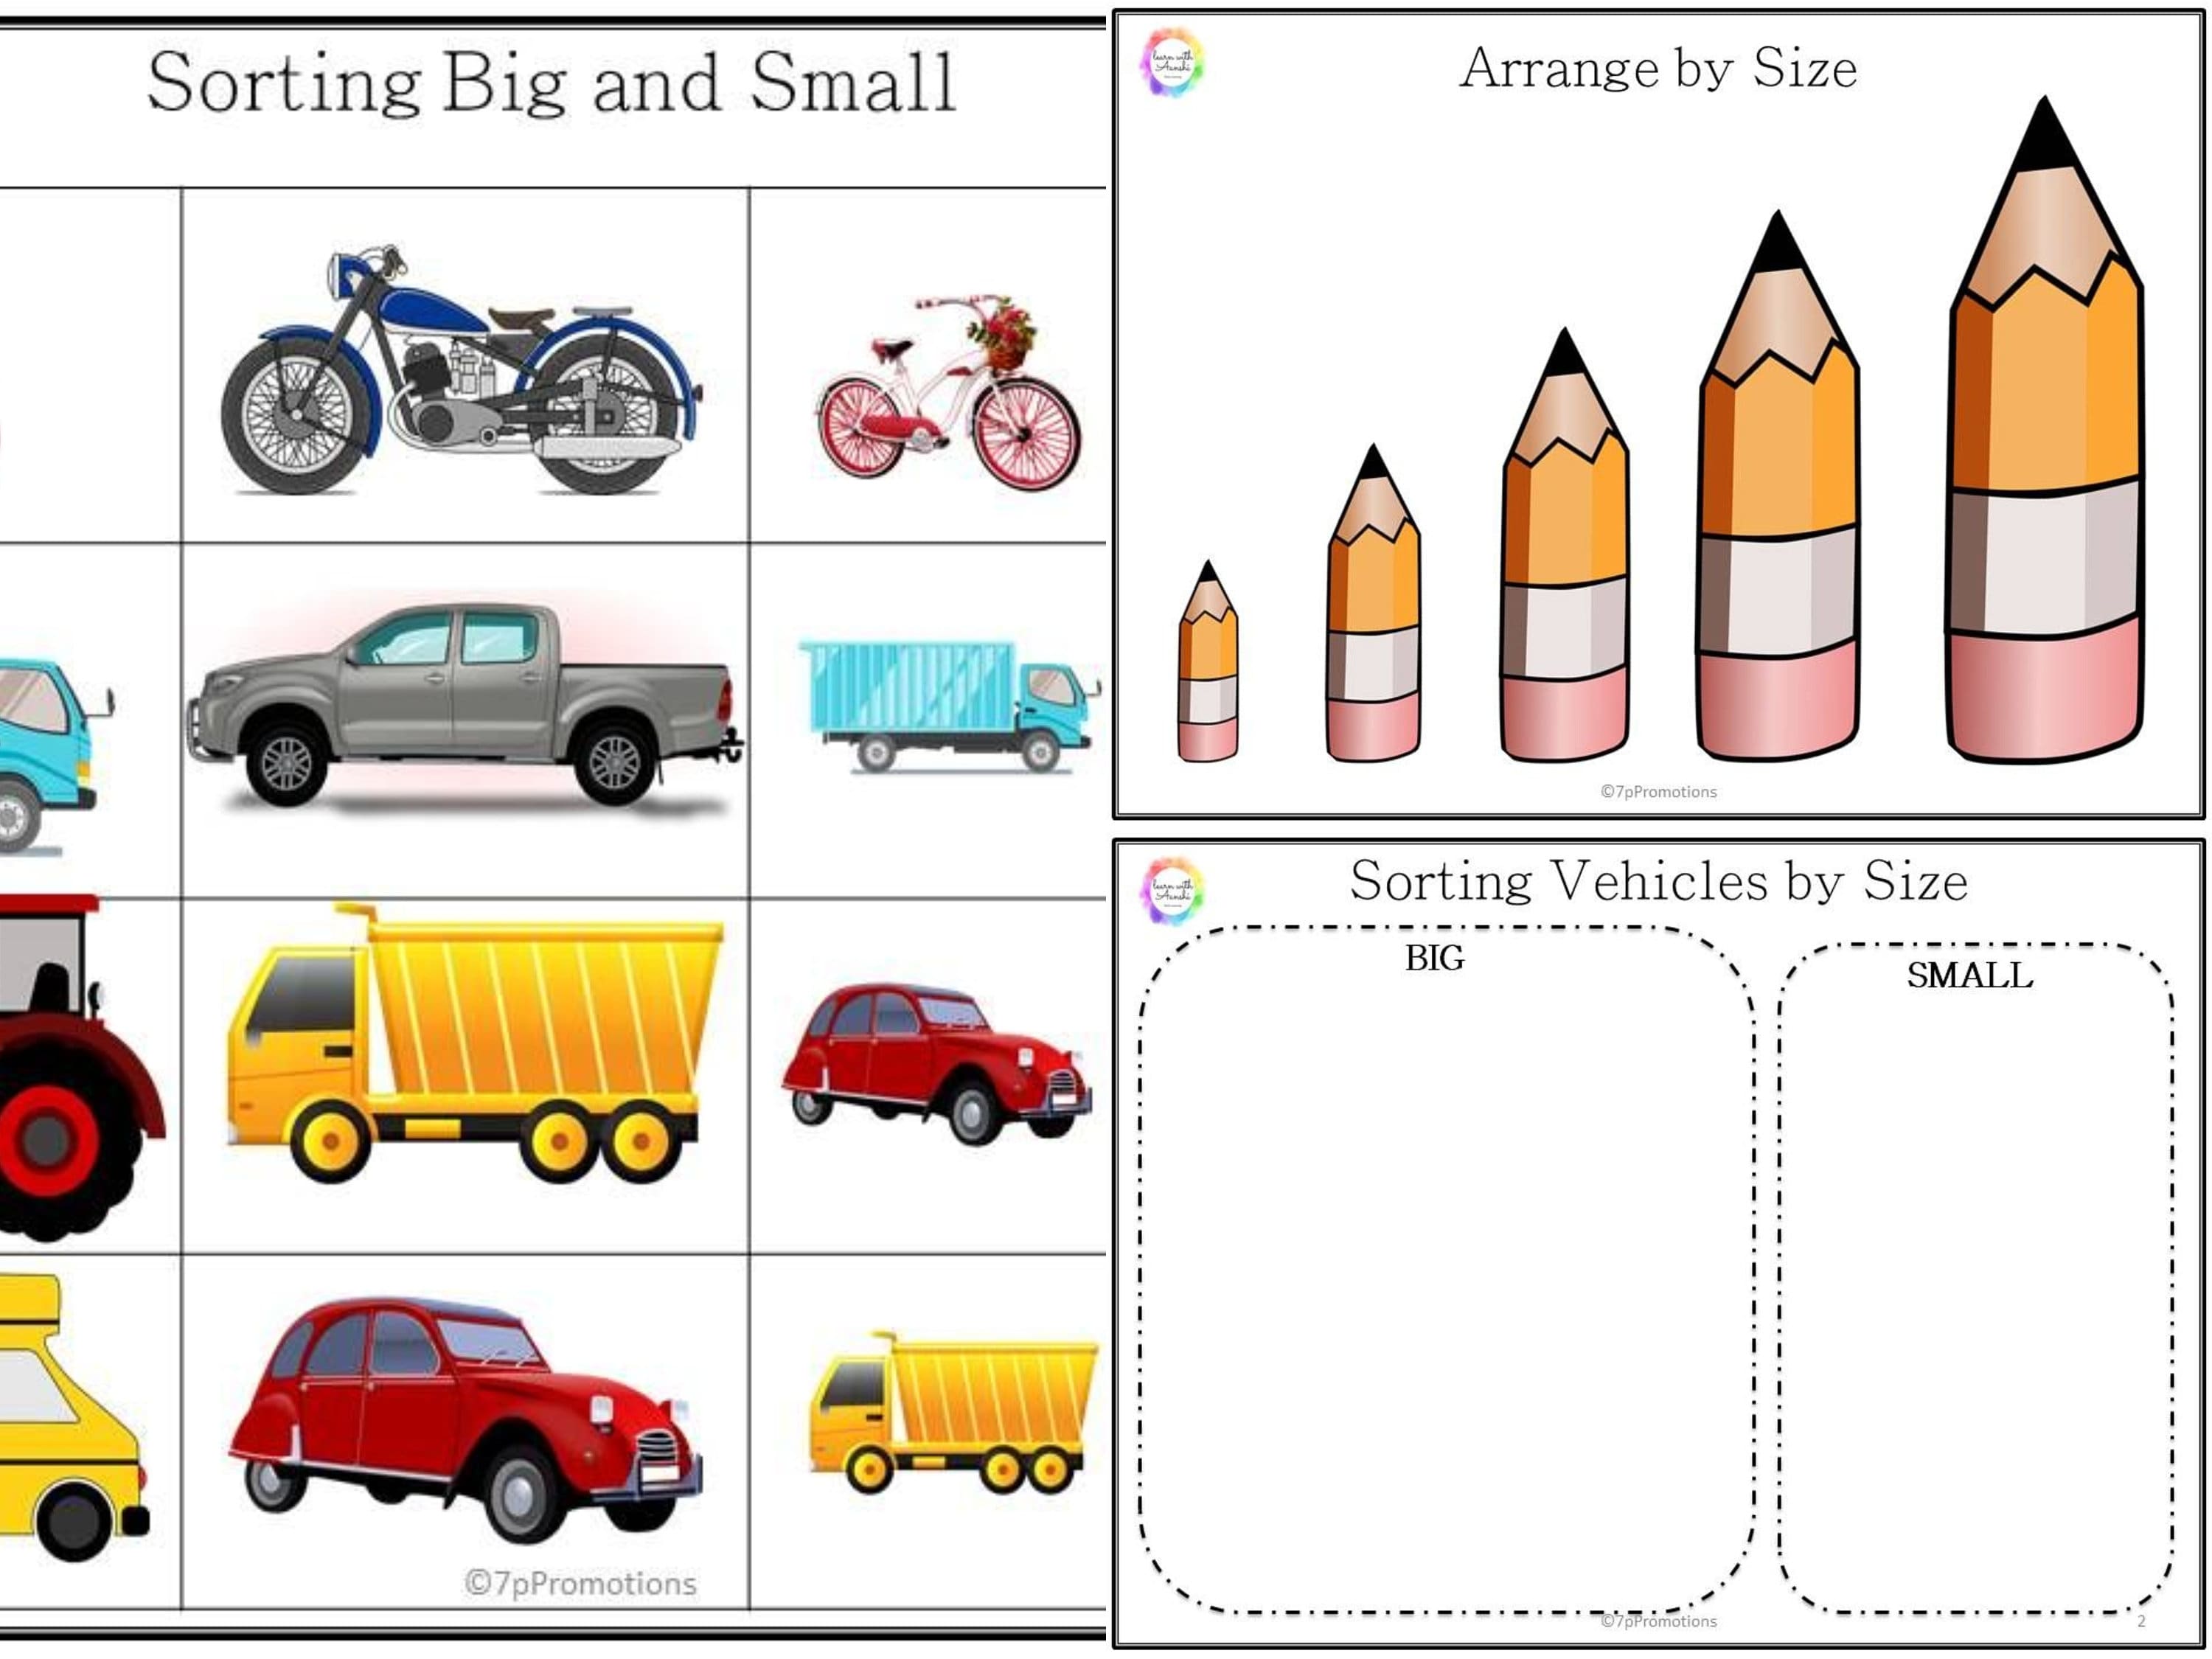
Let me be blunt: most size comparison worksheets are visually boring. They use the same clip-art bear or the same three balls in a row. A child who has seen twenty identical worksheets will tune out by the third page. The trick is variety in presentation, not variety in skill. Some days you use a worksheet where they circle the big object. Other days they color the small object. Occasionally, they cut and paste objects into "big" and "small" columns. This keeps the cognitive load on the comparison task itself, not on figuring out a new type of instruction every time.
When to Push and When to Pause
One of the most overlooked aspects of teaching size discrimination is knowing when a child is truly stuck versus when they are just bored. If a child guesses randomly on a page of ten items, do not assume they lack understanding. Check their eyes. Check the lighting. I have watched kids fail a "big and small" worksheet simply because the printer ink was too light to see the difference between the two items. If you suspect a vision or attention issue, switch to a hands-on activity for two weeks, then return to the printed format. The page should confirm what they already know, not teach it from scratch.
A Simple Comparison of Common Worksheet Formats
Not all printable activities are created equal. Here is a breakdown of the three most common formats and where each one genuinely helps:
| Worksheet Type | Best For | Common Pitfall |
|---|---|---|
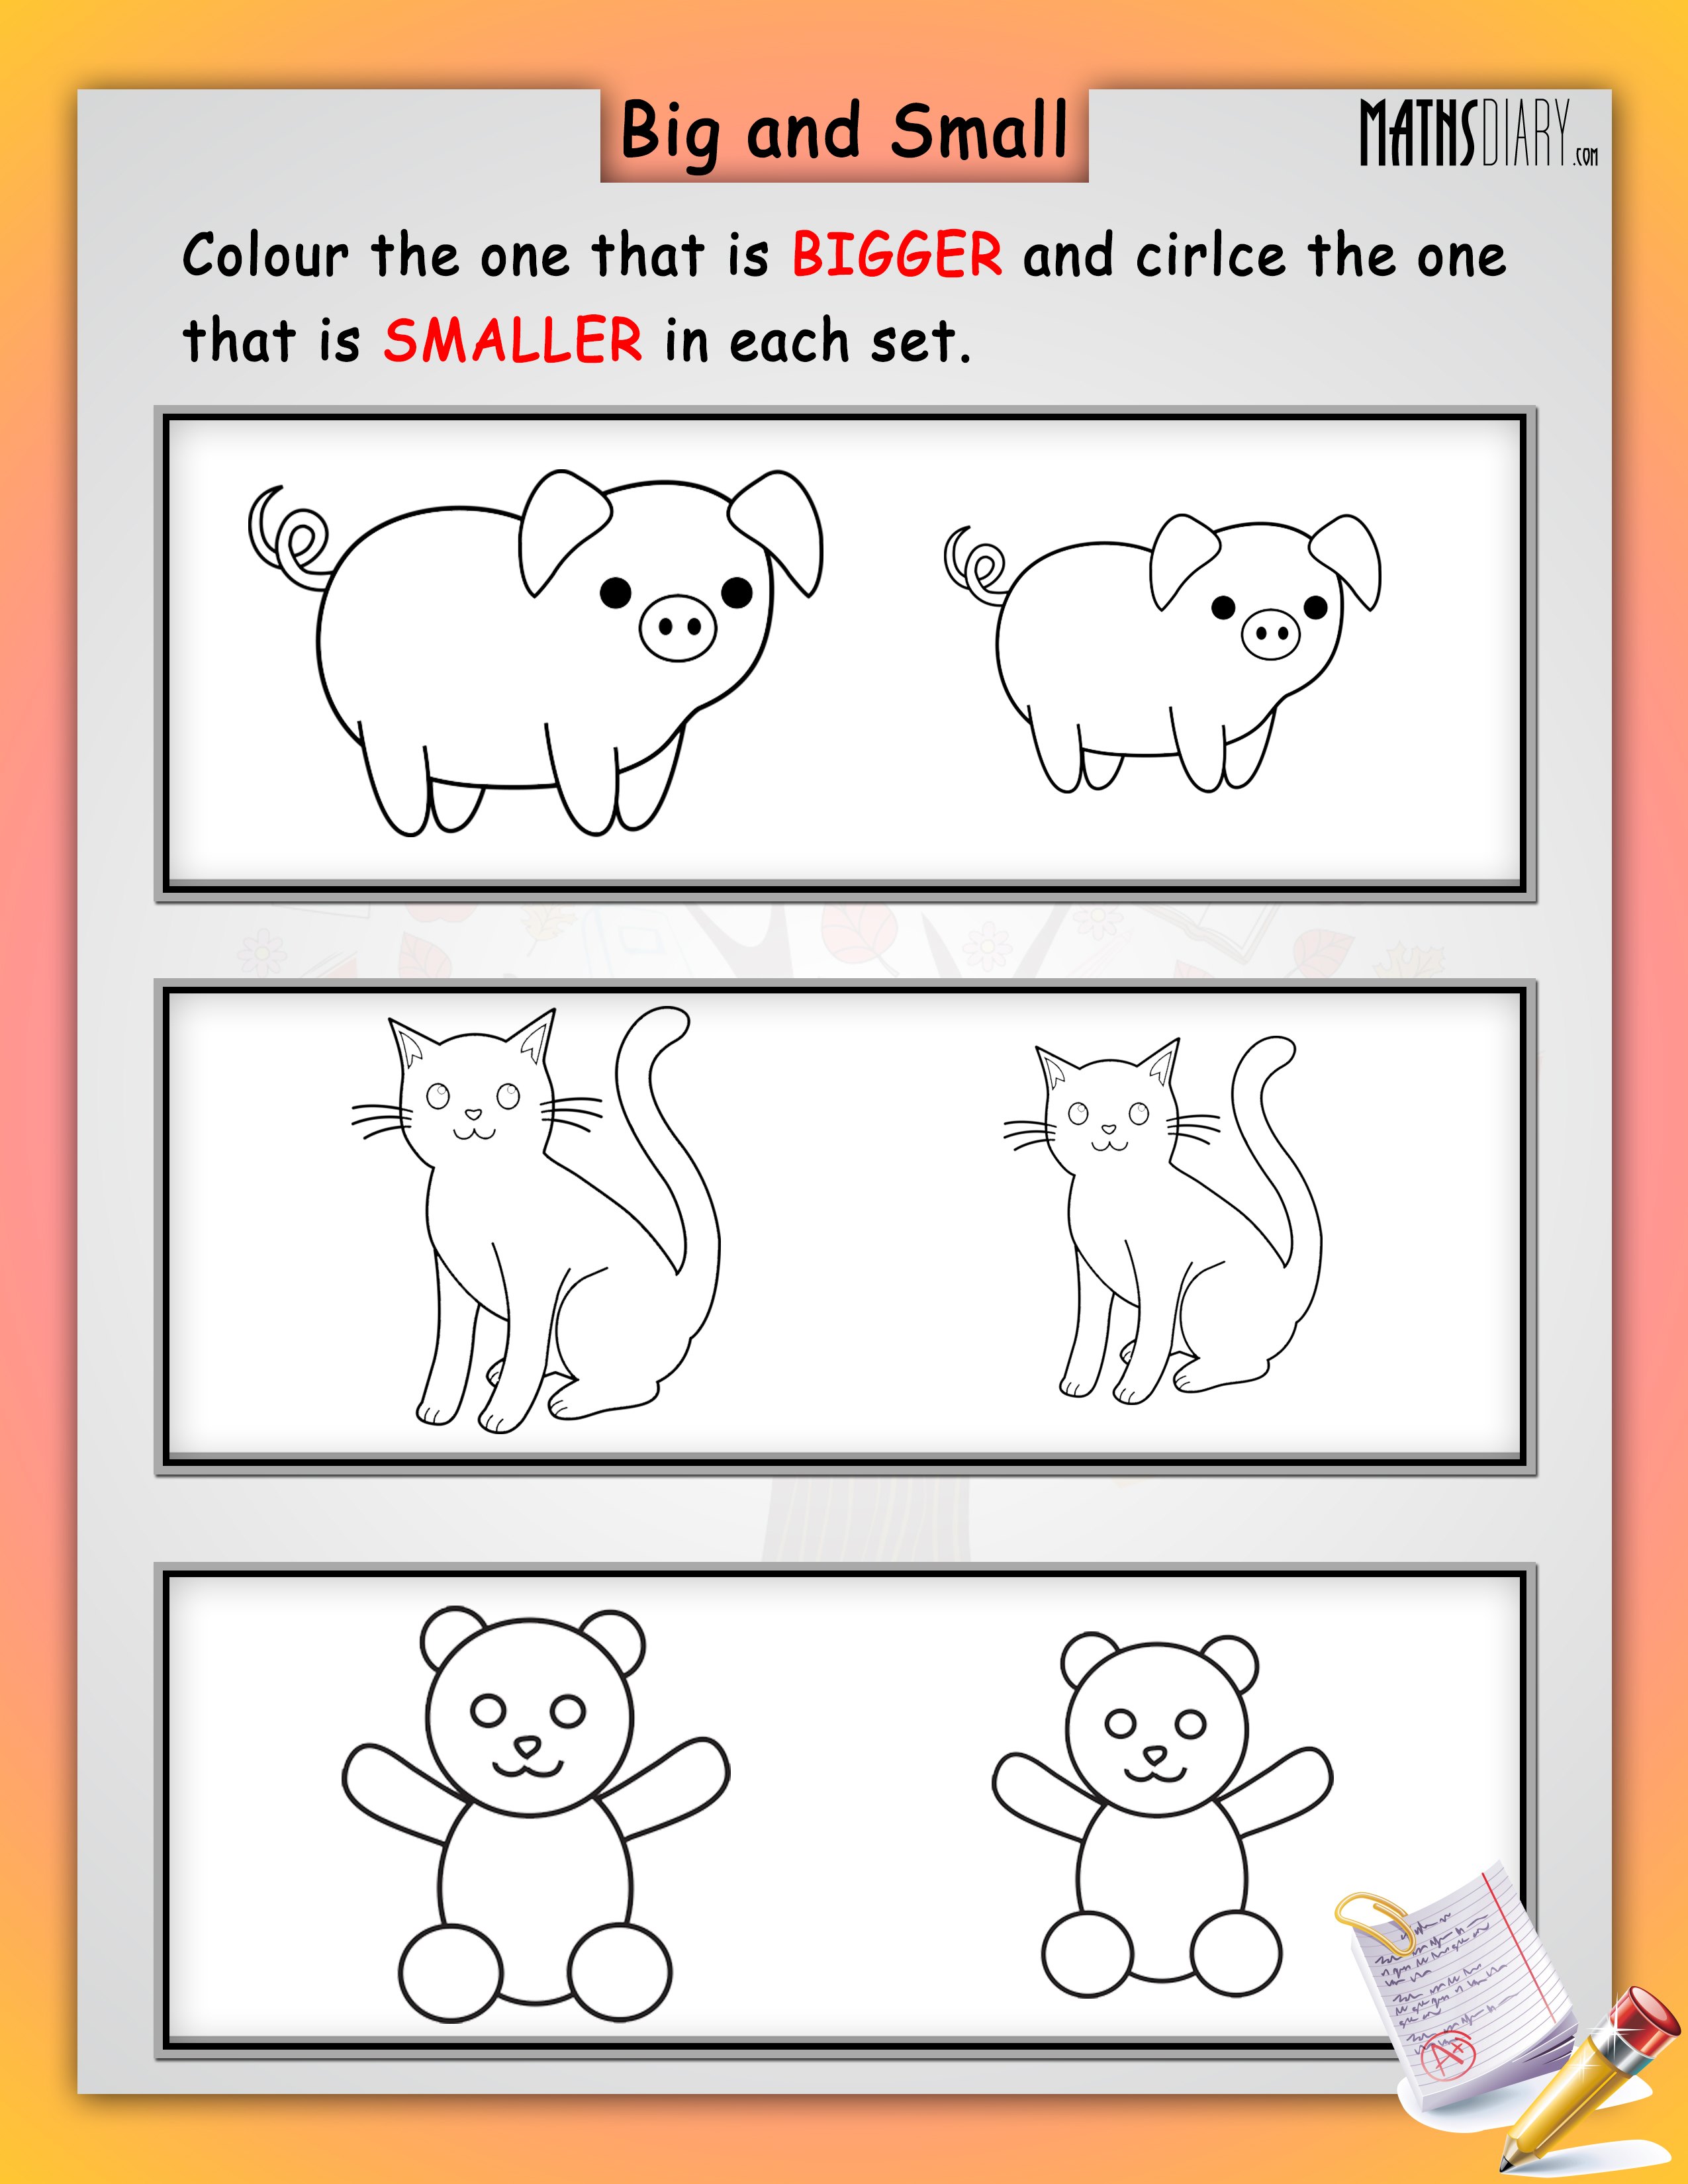
| Circle the bigger object | Building quick visual scanning skills | Objects too similar in size |
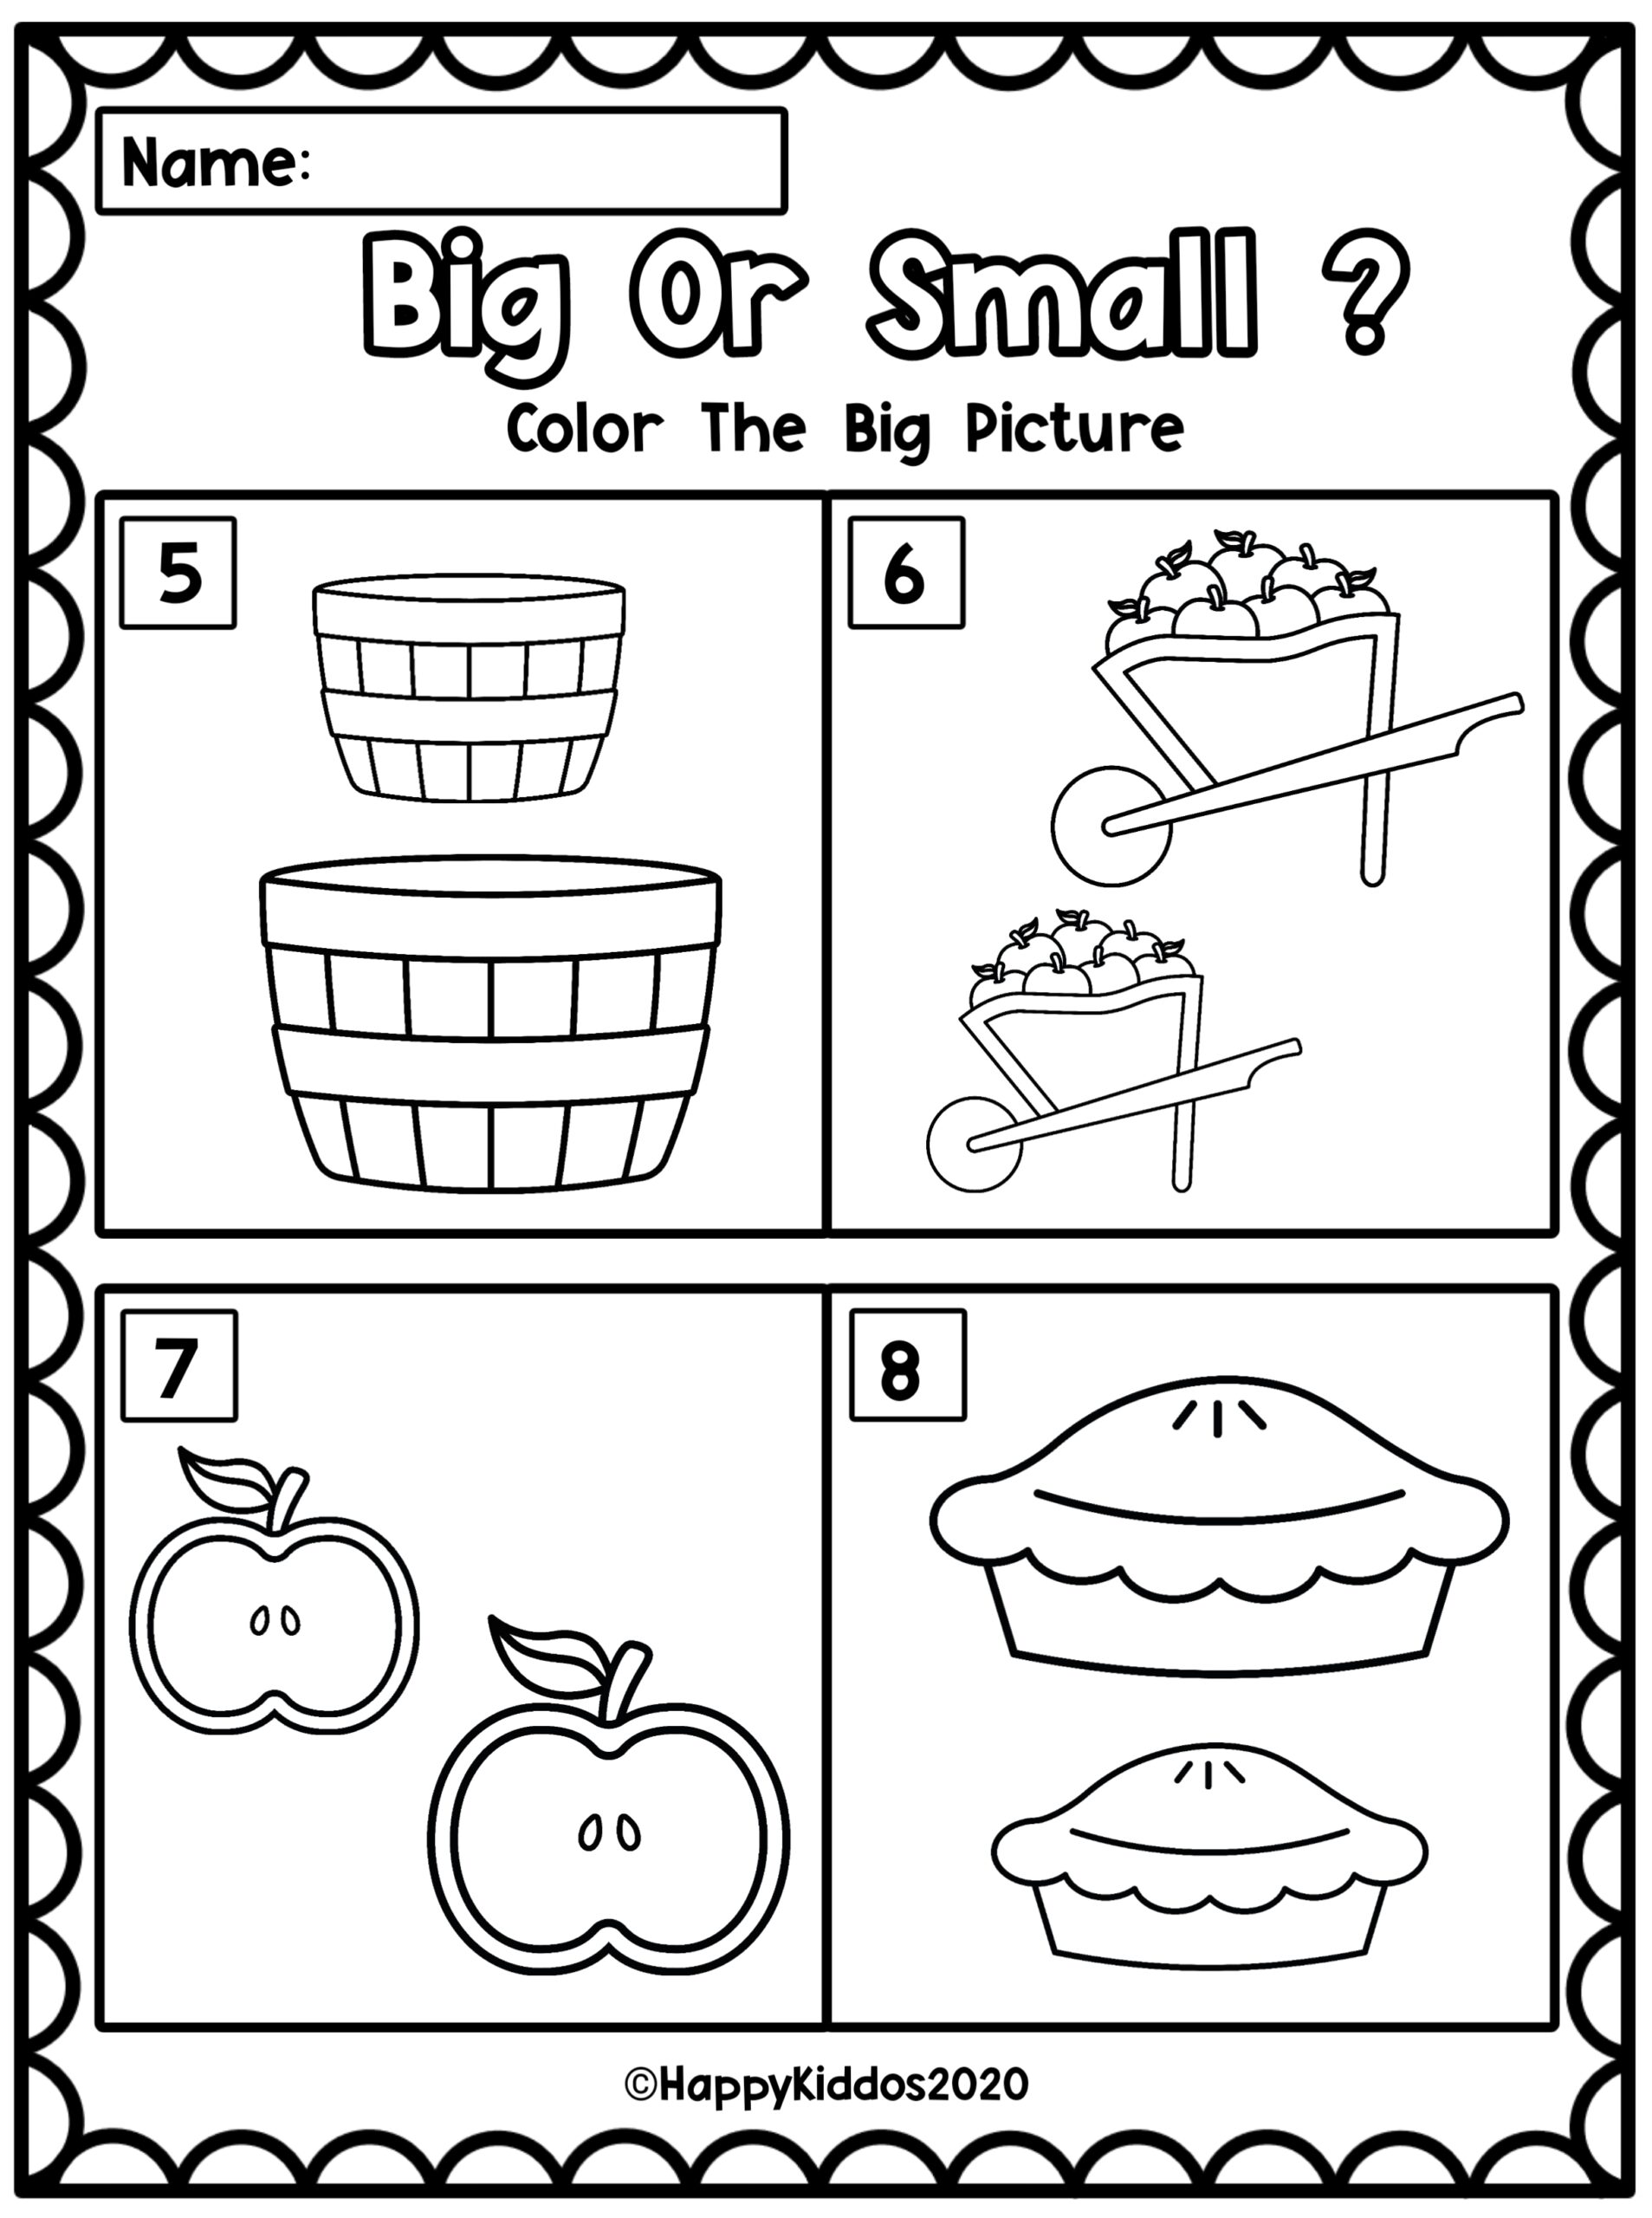
| Color the small items | Reinforcing vocabulary with motor output | Too many items on one page |
| Cut and paste sorting | Kinesthetic learners who need to move | Scissors frustration derailing the lesson |
Each format serves a different purpose, and rotating through them over a few weeks will yield far better retention than drilling the same "circle the big one" page twenty times. The key is matching the format to the child's current energy level and fine motor comfort. A tired child should not be handed scissors. A fidgety child should not be asked to color inside lines. Meet them where they are, and the size concept will stick.
One Last Thing Before You Go
You’ve just walked through the how and why of teaching size comparison, but here’s what really matters: every time you sit down with a child and a simple printable, you’re not just teaching big versus small. You’re building a quiet moment of connection in a world that screams for attention. That worksheet becomes a shared language between you and the little learner—a tiny bridge of patience, discovery, and the kind of low-stakes joy that makes childhood feel safe. This work matters because it plants seeds of confidence that will bloom far beyond the kitchen table.
Maybe you’re thinking, But my child already knows these concepts—is this really worth our time? That’s a fair thought, and I’ll gently push back. Repetition isn’t boredom; it’s mastery. When a child sorts, traces, and colors preschool worksheets big and small, they’re encoding visual discrimination and vocabulary into long-term memory. Even if they can point to the big truck today, tomorrow they’ll need to explain why—and that reasoning muscle grows only through playful practice. You’re not behind. You’re exactly where you need to be.
So here’s your soft nudge: browse the gallery of preschool worksheets big and small one more time, but this time, don’t just read—pick one. Print it. Leave it on the counter for tomorrow morning. And if you know another parent, teacher, or grandparent who could use a little help making learning feel like play, share this page with them. The best resources are the ones that actually get used, and your next step is already waiting.